Tile roofs are known for their durability, charm, and ability to withstand a variety of weather conditions. However, over time, individual tiles can loosen due to wind, rain, or gradual wear from exposure to the elements. Loose tiles may not seem like an urgent issue at first glance, but they can quickly lead to water leaks, structural damage, and higher repair costs if ignored. Understanding how roofing contractors address this problem helps homeowners appreciate the precision and care involved in tile roof maintenance. We will explore the detailed process professionals follow to ensure tiles are securely reattached and the roof remains in optimal condition for years to come.
Steps Roofing Contractors Follow to Reattach Loose Roof Tiles
- Conducting a Comprehensive Roof Inspection
Before reattaching any loose tile, Local Roofer begins with a thorough inspection of the roof. This step ensures that they identify all problem areas rather than focusing solely on visibly loose tiles. They examine surrounding tiles to check for cracks, chips, or other signs of damage that might not be apparent from the ground. This inspection also allows them to assess the underlayment, the layer beneath the tiles that provides additional waterproofing. If the underlayment is compromised, simply reattaching tiles would be a temporary fix rather than a lasting solution. By documenting and marking problem spots, contractors create a clear plan for the repair process. This initial stage sets the tone for the entire project, ensuring that the reattachment addresses both current and potential future issues.
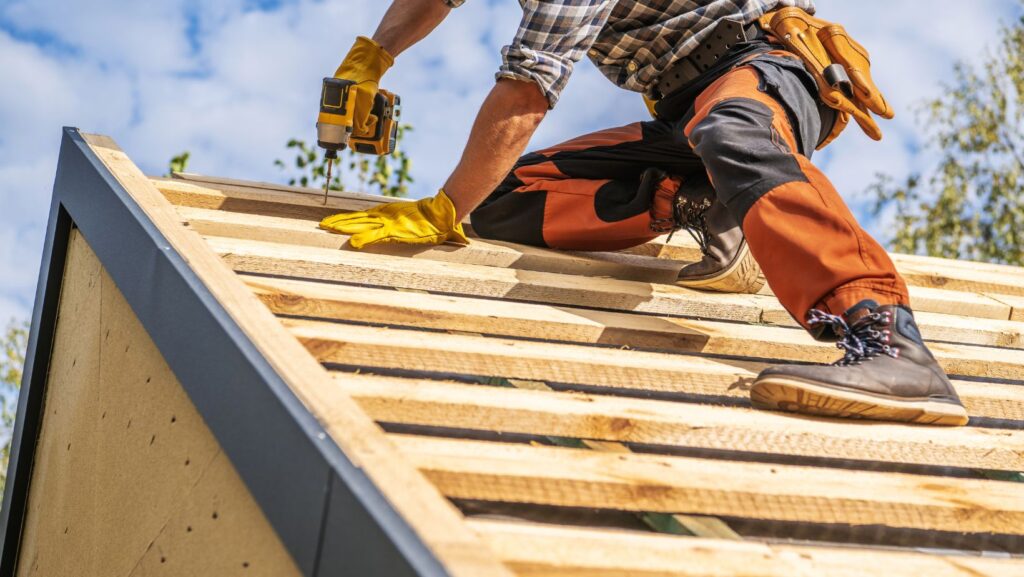
- Preparing the Work Area for Safe Access
Once the inspection is complete, the work area must be prepared for safe and effective repairs. Contractors use ladders, harnesses, and sometimes scaffolding to reach the roof without causing additional damage to tiles. Tile roofs can be fragile under direct pressure, so walking techniques are carefully considered to avoid breaking more tiles during the process.

Protective mats may be placed to distribute weight evenly, reducing the risk of new cracks. In some cases, contractors will temporarily remove surrounding tiles to make space for accessing the loose ones without interference. This step ensures the work can proceed smoothly without compromising the integrity of nearby roof sections. A well-prepared worksite not only keeps the repair team safe but also prevents further damage that could result in more costly repairs later.
- Removing the Loose or Damaged Tiles
Before a tile can be reattached, it must be fully removed to allow proper cleaning and preparation. Contractors carefully lift the tile, often using pry bars or other tools designed for tile roofing to avoid breakage. If the tile is cracked or beyond repair, it is replaced with one that matches in size, shape, and color to maintain the roof’s visual appeal. During removal, they also check the fastening system—often nails, clips, or adhesive—that previously held the tile in place. Any corroded or damaged fasteners are discarded to ensure the reattachment is secure. This step is crucial because attempting to secure a tile without addressing underlying fastening issues would only result in the tile loosening again over time. Proper removal creates the foundation for a secure, lasting repair.
- Cleaning and Preparing the Surface for Reattachment
After removal, the surface where the tile will be reattached is thoroughly cleaned. Contractors remove dirt, debris, and old adhesive or mortar to ensure a smooth surface for bonding. In many cases, roofing cement, foam adhesives, or mechanical fasteners are used to secure the tile, and these materials require a clean contact area to perform effectively. Any buildup left behind could prevent proper adhesion, leading to premature failure. This cleaning process may also involve minor repairs to the underlayment if it shows signs of wear. Addressing such issues during this stage ensures the roof remains watertight and stable once the tile is reattached. Preparation is often the difference between a repair that lasts for years and one that fails within a season.
- Securing the Tile Back into Place
With the surface prepared, the tile is carefully reattached. Depending on the roof’s design, location, and local building codes, contractors may use different fastening methods. Nails or screws are often used for mechanical security, while roofing adhesives or mortar can provide additional bonding strength. In high-wind areas, foam adhesives are sometimes preferred because they offer flexibility and durability under changing conditions. The tile is aligned precisely with surrounding tiles to maintain uniform spacing and appearance. Contractors ensure that the reattachment method chosen blends seamlessly with the existing roof, both visually and structurally. This precise alignment prevents gaps where water could penetrate and cause leaks. A secure fit also reduces the chance of the tile shifting or lifting during storms.
- Checking for Proper Alignment and Structural Integrity
After reattaching the tile, contractors conduct a final check to ensure proper alignment and stability. This step often involves gently testing the tile to confirm it is firmly in place without movement. They also verify that the reattachment has not altered the roof’s water-shedding pattern, as even slight misalignments can disrupt the way water flows off the roof. If adjustments are necessary, they are made immediately to prevent future complications. This check extends to nearby tiles to confirm none were loosened or damaged during the repair process. Contractors often perform a final sweep to clear away debris, ensuring the roof looks neat and uniform once the job is completed.
Reattaching loose tiles on a tile roof is a process that requires careful inspection, safe preparation, precise removal, and secure fastening. Each step, from the initial evaluation to the final clean-up, plays a vital role in ensuring the repair lasts and the roof remains both functional and attractive. By understanding this process, homeowners can better appreciate the value of timely repairs and professional care. A properly maintained tile roof not only safeguards the home but also preserves its aesthetic appeal for many years to come.